Showing posts with label blog design. Show all posts

Sunday, February 2, 2014

5 Go-To Resources for DIY Blog Design

For those of you who have just recently started blogging or are considering it, this post is for you...especially if you're hands-on and are interested in building your design yourself. I've not been blogging long and have never attended any related workshops. I just dove in head first. Thinking back on my experiences, these are the resources I found most helpful.

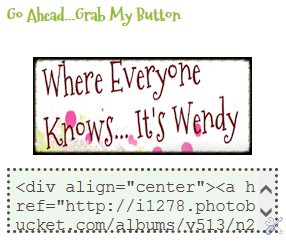
First was using Grab My Button Code Generator to create my grab button. This was the very first thing I tried designing on  my own. Since then, I've done another and one for a friend. I'm a little OCD and wanted all the blog buttons on my page to be sized equally and centered. I wrote a how-to post about this if you'd like to take a look at it.


The second thing I wanted for my blog was a cute little sign-off signature. For this, I used the Signature Generator at Cool Online Tools. It was very easy to do.


Thirdly, I found a font color code picker (I know...that sounds funny.) This tool at febooti software helped me match the font colors in my grab button, my sign-off signature, and favIcon to a color used within my blog.

Next on my list was to get a favIcon. This is the little graphic in front of your blog address on server tabs and favorites lists. These are great to have because they make your blog tab or name in a list stand out and easy for others to find your blog among other icons. I used FavIcon from Pics by HTML Kit  for this. It's easy just to use your blog button image to create your favicon.


Last up are social media icons (so last as a matter of fact that I haven't actually done this myself yet...but, plan to really soon.) I found an awesome site that I plan to use once I decide to do away with the first little set of icons I had made before I completely changed my blog design. I still think they are cute and just haven't wanted to toss them yet. The site I plan to use is Born Creative. They have all kinds of fabulously cute social media icons for which you can determine the size and color. The only drawback might be them not having created one for a source you use. They have the major ones though.


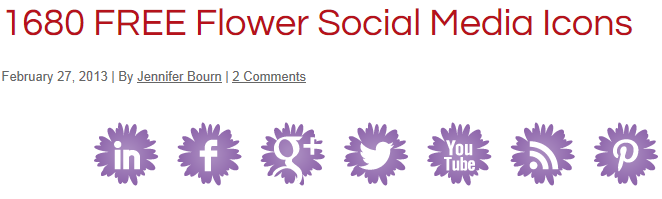
Well...that's it. The five tools I've found most helpful while tinkering with by blog's design. I hope you find them as helpful as I did. If you decide to try any of them, I'd love to hear how they work for you.

*Thanks for dropping by!

Share this Post Share to Facebook Share to Twitter Email This Pin This Share on Google Plus Share on Tumblr

Monday, April 15, 2013

A Hubby Jack Makeover: Help Needed

Us womens' friend, or should I say nemesis, "Hubby Jack" over at Hubby Jack's Blog Attack is having a contest for a blog makeover. I am a newcomer to the blogging world and pieced together my blog design part by part by pulling different things from various free blog template sites to create an elementary classroom teacher blog. I actually thought I did a relatively decent job until I read a post by Hubby Jack's wife, Holly, about when she first started blogging and how, at that time, her blog looked like a scrapbook page vomited on her screen. My thought, ".... hummmm, sorta like mine."

For that reason, I think a crisp, vibrant, newly designed blog makeover with a catchy name would be TO DIE FOR!

Also at the moment, I am in a major state of transition in my life. My youngest son is graduating from high school this year, and I'm definitely beginning to feel the "empty nesters" funk. I've also just ended a fifteen year relationship with the only person, other than my children, that I truly loved unconditionally...or let's say as much as I could without losing my sanity. Seems like he made it his personal mission to try to destroy me from the inside out. But let me say this...without a shadow of a doubt, I know his being out of my life is the best thing that could happen to me.

Enough bellyaching!

All that was just a segue to why I feel that starting a blog has been therapeutic for me. It has provided me with a creative outlet.  It helps to distract me from the nagging feelings that have recently been pulling at my heart strings.

While experiencing similar emotion, Adele wrote and recorded the top selling album of the 21st century. Well...I just took up blogging...HA! However, my current blog, The Sweet Life of Second Grade, is not exactly the place I imagined I would think out loud about personal matters. So actually, I think I'd like to maintain it for it's initial purpose and use Hubby Jack's design for a personal blog...maybe, say...The Sweet & Single Life at Almost 50...Aack!!!

I need your help though.


button


This is how it works: Just click on the Hubby Upgrade button above and leave a comment on his blog post about who you'd like to see win the blog makeover...hopefully me!

I want to send a heartfelt "Thanks!!" in advance for any of you who see fit to use your time to cast a vote for me.

*Thanks for dropping by!


Share this Post Share to Facebook Share to Twitter Email This Pin This Share on Google Plus Share on Tumblr

Saturday, April 13, 2013

Sizing Up My Buttons: An Easy Tutorial for Sizing/Spacing Grab Buttons Equally


Due to waking up this morning around 4:30 wide eyed and feeling rested, I decided to tinker with my blog. For a while now, I've wanted all my blog grab buttons to be more uniform because they were all different sizes and zigged zagged back and forth. I chose to be adventurous and take a risk to try to manipulate the HTML code for my buttons. And...it worked!! Look at the grab buttons I have under Blogs I Read or Use in my sidebar to the left to see an example. So for those of you who are interested in sizing up your buttons, I decided to post my first little tutorial.

There are 3 things to check for if you want uniform buttons. Some buttons might have one element but not another. The elements you want to look at are: sizing, centering, and spacing. In order to change or manipulate any of these elements, you must first click Layout in your menu items on the left hand side of your Blogger page. (These directions are for Blogger, but I'm sure there are very similar options for Wordpress. In fact, I know there are because I helped a friend place her grab button on her Wordpress blog, and the steps were very similar to the ones I followed for Blogger.)  

Sizing Buttons Equally

After pulling up your Layout page, go to your Gadget where your buttons are listed. Find the section of code that corresponds with the button you want to change. It will look like this:

 
<center><a
href="http://n2tching.blogspot.com/"><img border="0"
src="http://i1129.photobucket.com/albums/m514/thesweetlifeofsecondgrade/
LOGOBEST-1.gif"/></a>


To resize each particular button, you will need to insert the following section of code between image type" (i.e. gif", png", jpg") and the code at the very end that reads /></a>:


width="140" height="140"
          
Afterwards, your code should read like this:
 
 
<center><a
href="http://n2tching.blogspot.com/"><img border="0"
src="http://i1129.photobucket.com/albums/m514/thesweetlifeofsecondgrade/
LOGOBEST-1.gif" width="140" height="140"/></a>


Some button codes might have an additional thread of code just after the image type". The code looks like this:

alt="Blog Name"


If this is the case for you, insert the width="140" height="140" between alt="Blog  Name" and /></a> as in the following example.

<div align="center"><a href="http://n2tching.blogspot.com"
title="The Sweet Life of Second Grade" target="_blank"><img
src="http://n2tching.blogspot.com/2013/03/image6-e1363031933286.jpg"
alt="The Sweet Life of Second Grade" width="140" height="140"/></a>

               
You can change the numbers for width and height if you like. I used 140. It's better to use the same number for both so that your buttons will be square.


Spacing Buttons Evenly

Again, you will go to your Layout page, access your Buttons Gadget, and locate the section of code for the button you want to work with. Then, you'll need to add

<center><a
   
as the first line of code above the existing code for the button as in the example below:


<center><a
href="http://n2tching.blogspot.com/"><img border="0"
src="http://i1129.photobucket.com/albums/m514/thesweetlifeofsecondgrade/
LOGOBEST-1.gif" width="140" height="140"/></a>


Centering Buttons

Follow the same procedures (Layout and Buttons Gadget) as explained above to locate the existing code for the non-centered button you want to move. To center the button, insert the highlighted section of code shown below just before the existing code: href="http://n2tching.blogspot.com".


<div align="center"><a href="http://n2tching.blogspot.com" 
title="The Sweet Life of Second Grade" target="_blank"><img 
src="http://n2tching.blogspot.com/2013/03/image6-e1363031933286.jpg"
alt="The Sweet Life of Second Grade" width="140" height="140"/></a


Well...that's all folks. Hope this tutorial will be helpful to some of you. Please don't hesitate to comment if you have any questions or to let me know if it helped you.


*Thanks for dropping by!


Share this Post Share to Facebook Share to Twitter Email This Pin This Share on Google Plus Share on Tumblr

Saturday, March 23, 2013

It's My Blog...And I'm Sticking to It

Well, I'm finally finished with all the tweaking, changing, and tweaking again! I've been using bits and pieces from different places to construct the "face" of my blog. Since different components were coming from different sources, they didn't all ge-haw a lot of the time which caused all the tweaking and re-tweaking. Finally this is it, and it's gonna stay this way...at least for a good little bit.

I want to give a HUGE shout out to Casey at Hot Bliggity Blog for all her tremendous help and patience. Look for Hot Bliggity's button in my sidebar. She has fabulous free backgrounds and also does custom work for very reasonable fees. 

As I was walking out of work a couple of days ago, I had this overwhelming feeling of satisfaction and contentment. I wasn't sure exactly why. I think it was because I'd had some great interaction and exchanges with my students. I'd also received a little "happy" from some classroom grandparents, Meme and Hoddy, who volunteered in my class last year. Even though I no longer have their grandson in my class, they're still always leaving me little treats to brighten my day...and fatten me up. They're both retired Memphis City school teachers and understand what it's like to be "in the trenches". They are also the sweetest couple ever! Here's the little treat I found on my desk that day.   


Our school also has the cutest Spring bulletin board up in our front entryway. It helps me make a cheerful entrance and exit each day. Isn't it darling?


Time to wrap this up. Have to get my behind in gear. I've got a Memphis Tiger's WIN to watch this afternoon!
 
** Be sure to stop by tomorrow. I will be unveiling the details about my first big giveaway
(a Piperlime $200 giftcard)!
 
*Thanks for dropping by!


Share this Post Share to Facebook Share to Twitter Email This Pin This Share on Google Plus Share on Tumblr

Sunday, March 10, 2013

Go Ahead. Grab My Button!

While writing my previous post, I was in the midst of blog button trials and tribulations. I was determined to create myself a cute little button and code for this blog. After several "How To" articles and a number of attempts over a few days at getting it just right, I did it...WooHoo! However, I don't know if I would have been successful if I hadn't stumbled across a couple of very beneficial resources to which I want to give credit. The first was Shabby Blogs where I found the image. They have lots of fabulous freebies for dressing up your blog. Look for their button over there in the sidebar - - - > under my "Button Besties". The other awesome resource I found was a really cool little web app, Grab My Button Code Generator. Here is the link:  http://64b.co/09P. All you have to do is fill-in fields for Blog Title & URL, Image URL, and a few Colors/Code Box Options. It was very easy to use, and it created the code for my button. Then, all I had to do was copy and paste it into the Button Gadget I'd added to my template. 

Now, my next endeavor is to acquire and insert the social media icons for my Facebook, Pinterest, Instagram, and Teachers Pay Teachers accounts. These were supposed to be included with the blog template I purchased. However, I have yet to receive them. I emailed the company today and am waiting to hear back from them. I'll let you know how this goes once I see what kind of response I get from them.

So far, I've really focused on creating the face of my blog. Next, my goals are to concentrate on content, acquiring some followers/comments, and networking. If you have any suggestions, especially in the areas of acquiring followers and networking, I would sincerely appreciate your sharing them.

*Thanks for dropping by!


Share this Post Share to Facebook Share to Twitter Email This Pin This Share on Google Plus Share on Tumblr